Google SAML App Creation
Step 1: Create a SAML 2.0 application in the G Suite management console
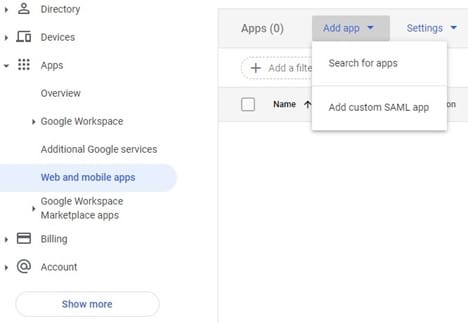
Log in into your G Suite admin console using your admin account and choose Apps, Web and mobile Apps, Add app, then Add custom SAML app
Provide a name for your SAML 2.0 application, description, and an optional logo to easily identify the application in the user login portal. After entering the inputs, choose Next.
Step 2:
Download the IdP metadata and save it locally. This needs to be emailed to ByteSpeed(lhulne@bytespeed.com) Choose Next.
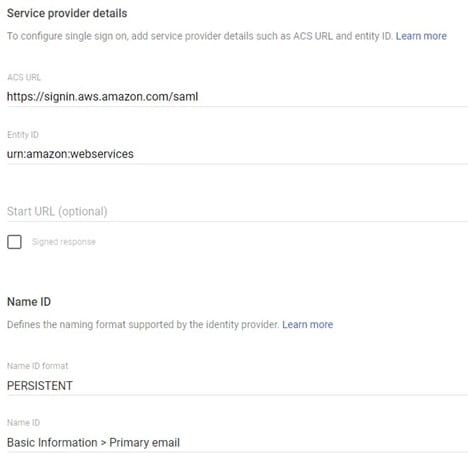
Provide the following input for various fields and then choose Next.
- ACS URL — https://signin.aws.amazon.com/saml
- Entity ID — urn:amazon:webservices
- Start URL — Relay state URL of your AppStream 2.0 stack. ByteSpeed Needs to provide this Value.
- Signed Response — Leave it unchecked.
- Name ID — Basic Information, Primary Email.
- Name ID Format — Persistent.
Step 4: Add custom SAML attribute mappings
Navigate to the newly created SAML app. Choose Main menu, Apps, Web and mobile Apps and select the newly created application.
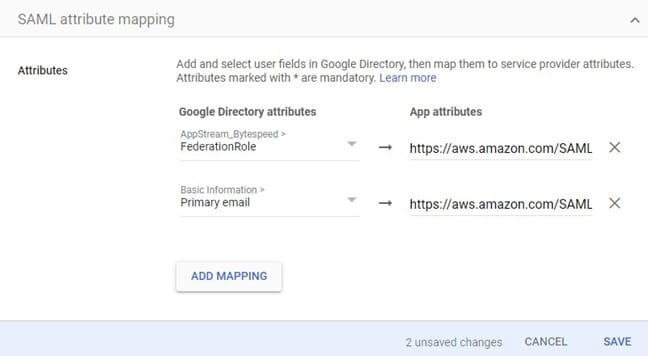
Choose Configure SAML Attribute Mapping, Add Mapping, add two mappings as defined below, and then choose Save.
- Application attribute — FederationRole
- Application attribute — Primary Email
Step 5: Assign the SAML application to the user
Choose the SAML application from the Apps dashboard.
From the details page, you can choose to do one of the following:
- Turn on the app for every user in your G Suite account.
- Turn on the app for a selective organization under your G Suite account.
- Assign to a group (this is recommended, required for attribute automation) o Create a new group and add all users whom you want to access AppStream

Step 6: Populate the values of the custom SAML attributes for a user
Select a user whose custom attribute values have to be updated from the Users dashboard. In the User details page, choose User Information.
Edit the values for AppStream_Bytespeed, the custom attribute category, as defined below, and choose Save.
- Federation Role — Comma-separated string of the IAM federation role ARN and IdP
ARN in the following format: <Role-ARN>,<IDP-ARN> <–ByteSpeed will provide this
Repeat the steps for other users to whom to assign this SAML application.
Test the federation by choosing the SAML apps from the Google Apps menu. Click on Test SAML Login