How to Use ByteSpeed’s Ticket System (Vector)
Vector is our ticket management system. If you have access to it, then you can use it to check on your companies’ tickets.
The first step is to setup Vector. When you login you will see the following:
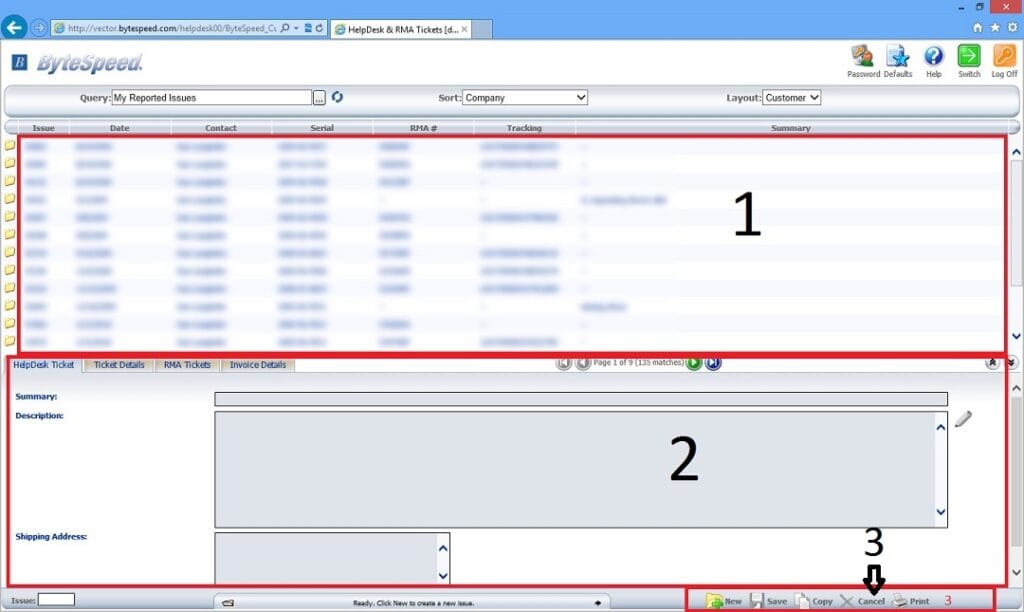
Section 1 is your ticket list, section 2 is the selected ticket details and section 3 is your ticket controls. Since we want to see the most recent ticket first, change Sort to Most Recently Submitted:

That is it for setup.
How to view a ticket:
Helpdesk Ticket:
Select a ticket from the ticket list. Once you do that, you will then see something similar to this:
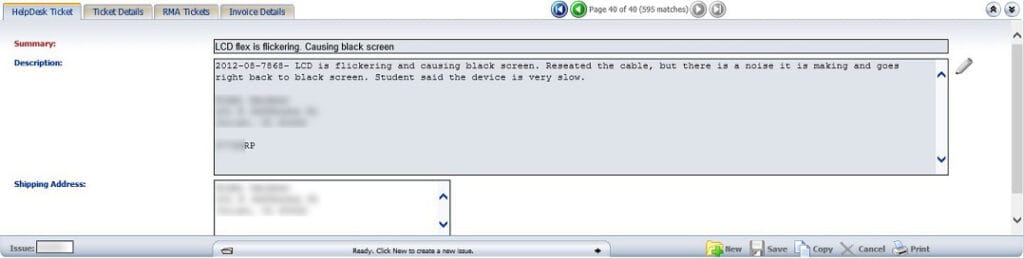
In the Helpdesk Ticket tab you will see your summary, an extended description of the issue and the shipping address. If you click on the RMA Ticket tab you will see this:
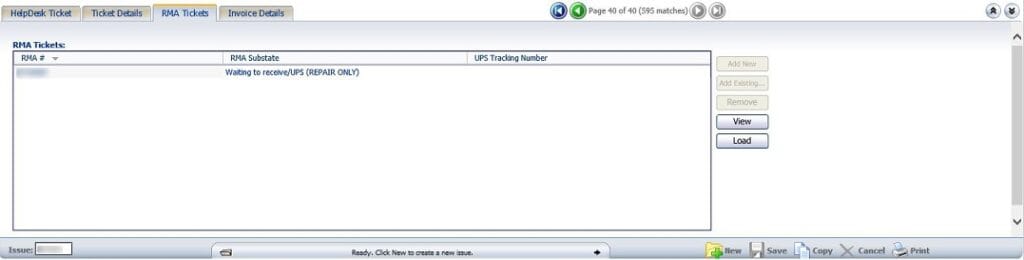
If you see a ticket listed similar to the above picture, it means another RMA ticket was created and attached to this ticket. You will be able to see the state of the attached ticket in that list. If you click on the attached ticket, Vector will take you to it.
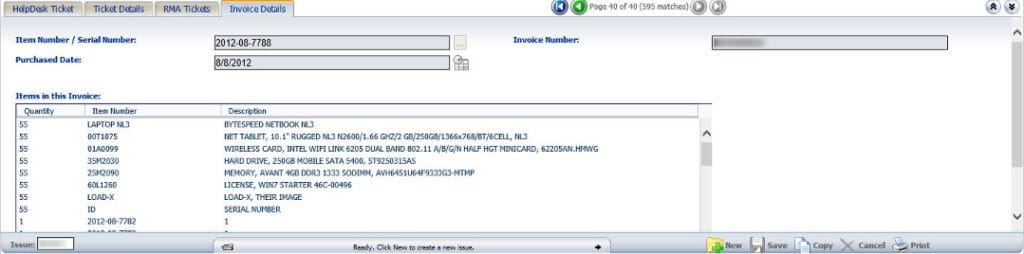
In the Invoice Details tab you will see the ByteSpeed serial number off of the computer that this ticket is created for, the purchased date, invoice number and the configuration of the machine:
How to tell if your helpdesk ticket has been completed:
There are two ways to tell if your ticket has been completed or viewed. The first method is through the RMA Tickets tab:

If you see that there is another ticket attached, then this ticket has been completed. Whether the attached ticket is a RMA or a Repair, you should hear from us via an email indicating that we are processing your request.
The second method is if there is a RMA number (30000RP or 30000RA) number in the description. Occasionally we have to combine tickets into one RMA ticket. We can only add a sub-ticket to one parent ticket so when we combine your tickets into one ticket, we add that RMA number to the description of the tickets that we combined. You should still hear from us via an email.
How to tell if your RMA Ticket has been completed:
An RMA ticket is slightly different. You will see the following instead:
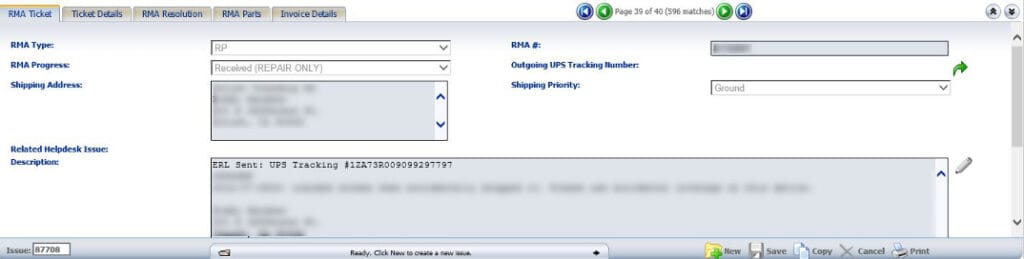
The RMA Progress is where we need to look. There are four options for it – new, completed, received and waiting to receive. You will only see the last two if the RMA is a repair. A progress of New means that the request is “new” and we haven’t processed it yet.
Completed means that we have processed your request. You can tell when it was completed on the RMA Resolution tab via the Resolution Date field.
If the RMA is a repair then Received means that we have received the repair but have not started on it. If the repair has been started, then on the RMA Resolution tab, you will see in the Resolution box any accessories that the machine came in with and you should see a name in the Work Performed by box.
Waiting to receive means that either you have an email with a return label in your inbox (or on the way) or that the package is on it’s way back to us. You can track that package via the ERL Sent: UPS Tracking value in the description.
If the repair ticket is completed, you can go to RMA Resolution to see what the fix was. You can check the tracking via the Outgoing UPS Tracking field. That field will populate by the end of the day that the ticket was completed. To track the package, click the green arrow and Vector will take you to UPS.com where you can view the tracking information. Occasionally, a completed ticket won’t have any tracking information. If the ticket was completed that same day, then wait one more day and there should be a tracking number that comes up. If we send the machine back with multiple machines, the tracking number might not show up in Vector. Unfortunately at this time there is no way to tell if the machine was shipped with multiple machines. If the tracking number hasn’t populated within a day or two of the Resolution date then give us a call at 1-877-553-0777.
How to create a ticket:
To start, click on new:

Then click on Invoice Details:

Then click on the “…” next to the Item Number / Serial Number box:

You will then see the following:
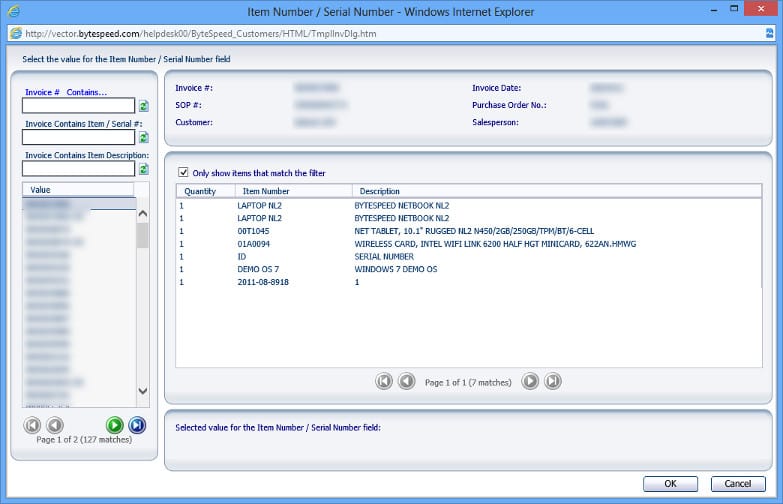
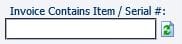
Type in the machine’s ByteSpeed serial number (i.e. 2012-08-7868) in the Invoice Contains Item / Serial #:
Then press Enter or click on the refresh button. After a moment, you will see the serial number show up in that window. Double click on it or select the number and click on OK. Please note at this time you can only look up serial numbers in the 20xx-xx-xxxx format.
Vector will then fill out the Item Number, Invoice Number (and subsequently the Items in this Invoice) and on the Helpdesk Ticket tab the first address attached to this particular Invoice.
You will then want to add any information about the issue you are having in the Helpdesk Ticket tab. You will also want to double check the address that Vector pulls up because we will use this address if we have to ship anything back that is related to this ticket.
Once you are done, click Save:

A couple of notes:
- Once you save a ticket, you won’t be able to edit it.
- If you have multiple machines from the same series, you can put them all in one ticket instead of creating multiple tickets. If you are going to do this, use one serial number for the Item Number and put the other serial numbers in the description or summary. We will need each machine’s serial number in the ticket.
- Occasionally Vector won’t find the serial number due to a couple of reasons. If the serial number has an R in it, try putting in the number without the R. Otherwise just type in the serial number in the description or summary. Please make sure to add an address as well.
- The only way to see an invoice is if you follow these steps. If you manually type in the serial number Vector won’t pull up the information.
- The more information you include in the ticket the better and faster we will be able to help you. Please include any troubleshooting steps you have tried and what you would like us to do about your issue.