Before we begin, if you have any questions or concerns, please reply here, send an email to helpdesk@bytespeed.com or call us at 877-553-0777
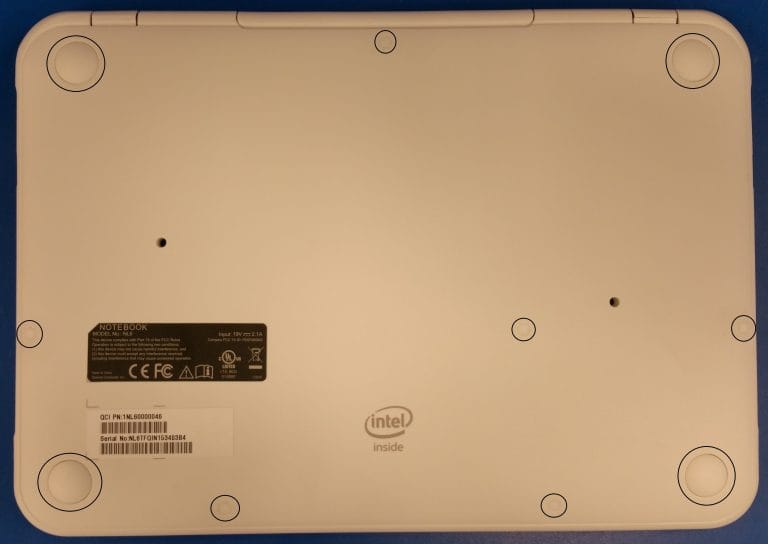
To begin, first remove the 10 rubber screw covers on the D panel, their locations are circled in the below image.
Remove the screws, then use a pry tool to remove the C panel assembly from the D panel.
Be careful as the keyboard and touchpad ribbons are connected to the motherboard.
With the C panel removed, your Chromebook should now look like this:
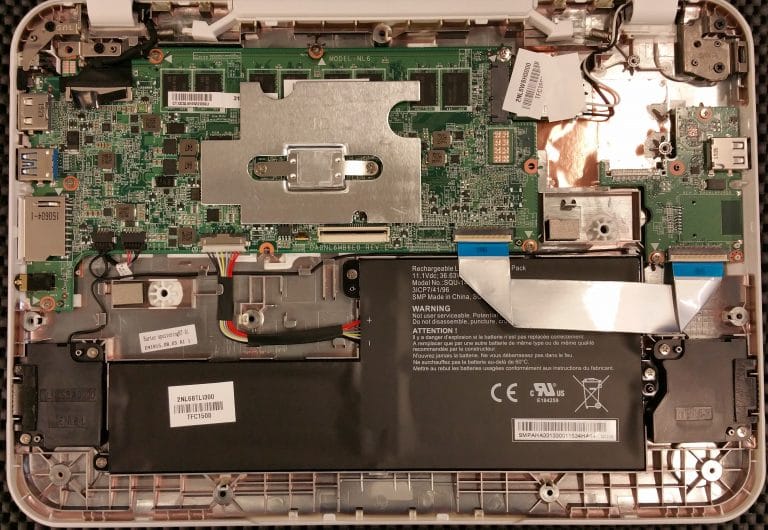
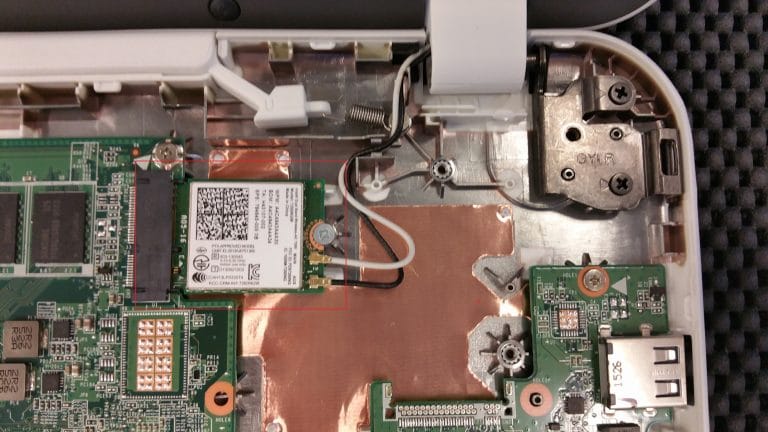
Now that you have access to your motherboard, start removing the connections that are outlined in the below images.
You will be disconnecting the wireless card, LCD cable, battery, speakers, daughter card, and DC jack.
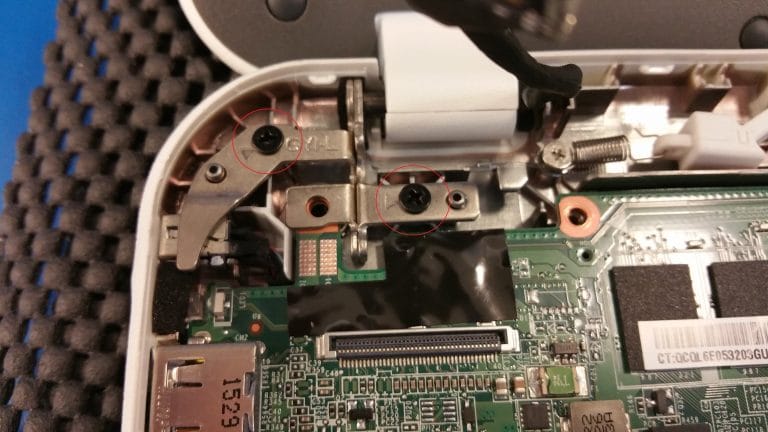
You will have to remove the LCD assembly from the D panel in order to remove the motherboard, as the hinge covers the
motherboard partially.
The below images show the screws that need to be removed.
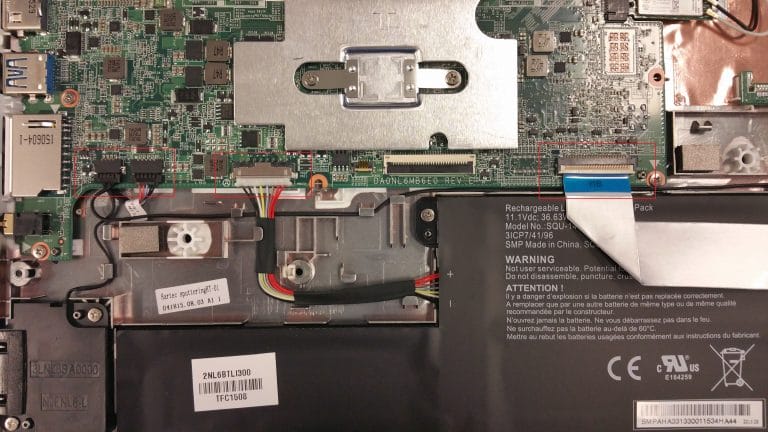
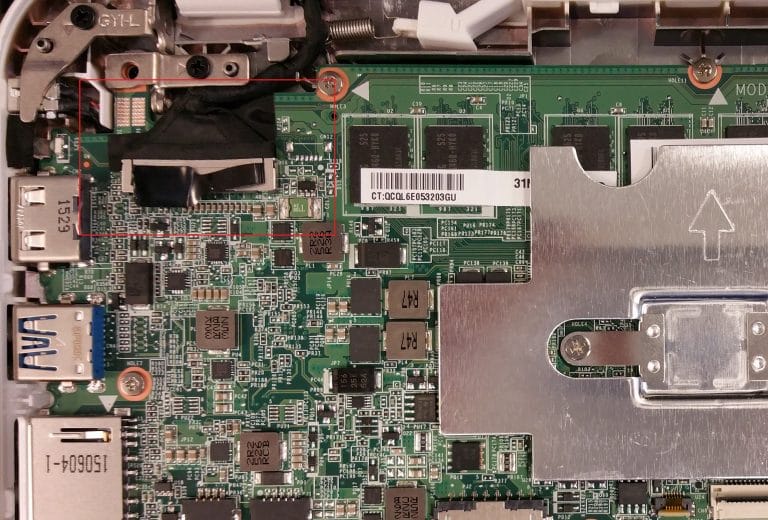
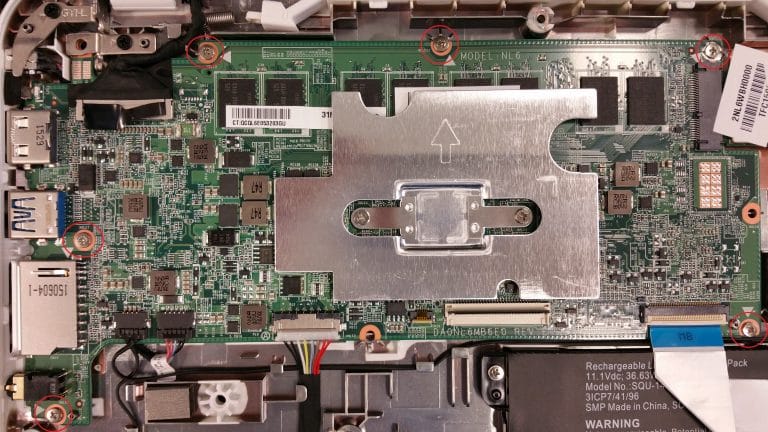
Once all these are removed, unscrew the 6 screws holding the motherboard to the D panel.
Those screws are outlined in the below image.
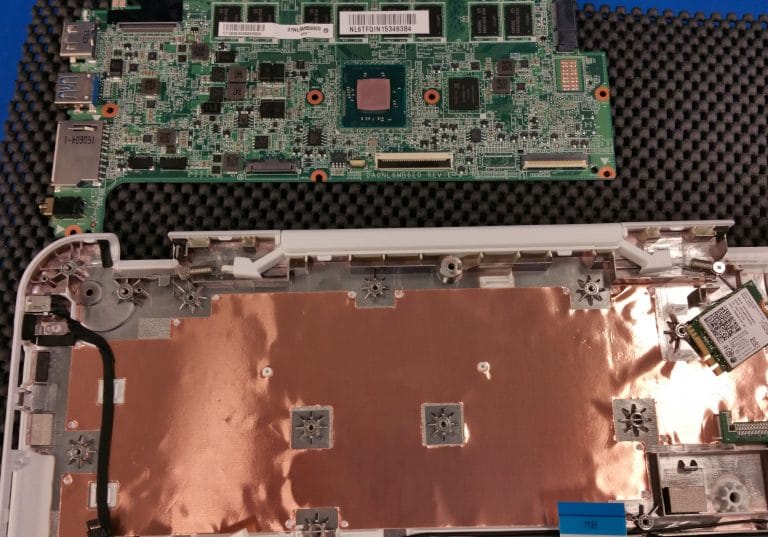
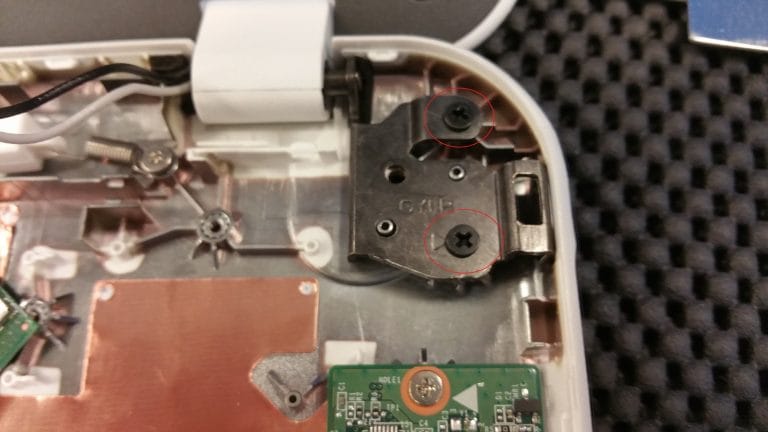
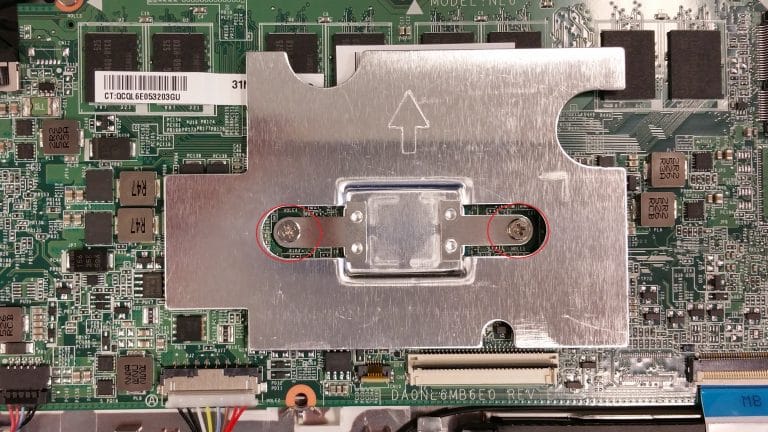
Now the only thing holding the motherboard to the D panel is the CPU heat sink.
Remove the 2 heat sink screws, which are outlined in the below image.
You should now be able to remove the motherboard from the D panel.