Before we begin, if you have any questions or concerns, please reply here, send an email to helpdesk@bytespeed.com or call us at 877-553-0777
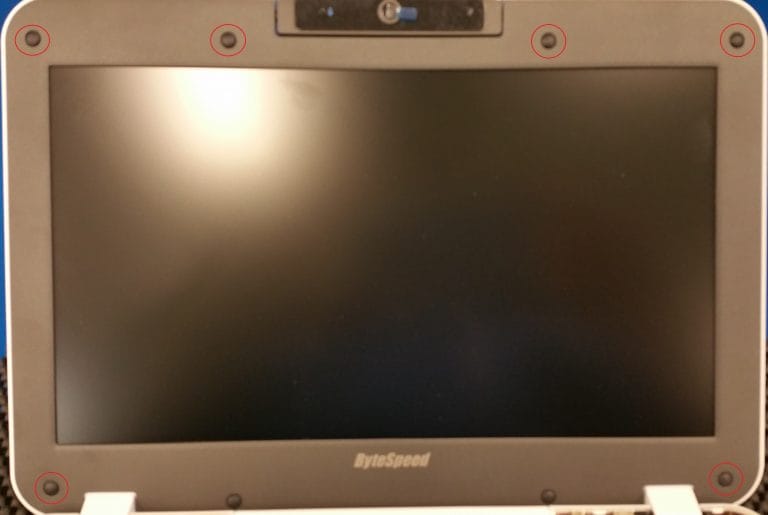
First remove the 6 rubber screw covers, then the screws that are on the B panel (LCD Trim).

After the screws are removed, use your fingers to pull up on the inside of the B panel.
The panel should just unclip itself as you pull up, but be careful on the bottom part as there is adhesive holding the panel to the LCD.
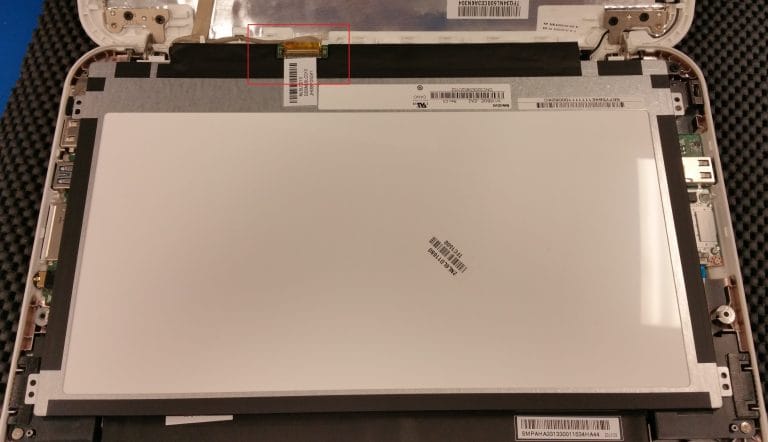
Now after the B panel is removed, there are 4 screws holding the LCD to the hinges. They are circled in the below image.

Once the screws holding up the LCD are removed, you should be able to take the LCD out of the assembly.
Now disconnect the LCD cable from the LCD. You can see where it connects to the LCD in the below image.

