Runs the Express BIOS update from a batch file without the need for user intervention. This is useful for remote BIOS updates when user interaction is not desired.
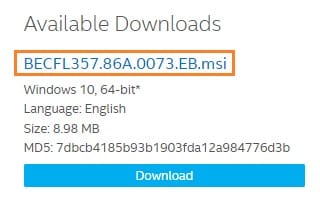
- Download the Express BIOS update file (.EB.msi) for your Intel NUC. Example:

2. Download the Express BIOS update file (.EB.msi) for your Intel NUC. Example:

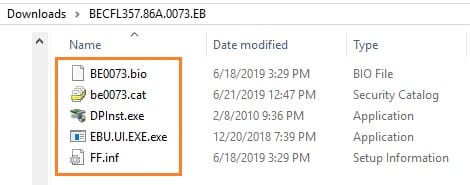
3. Extract files to a folder.
4. Open a text editor such as Notepad to create a batch file that contains only the following two lines:DPInst.exe /q /f /se
Shutdown /r /t 10 /c “Upgrading the BIOS. The computer will reboot in 10 seconds” /f /d p:0:0Command line switch notes
| DPInst.exe | ||
| /q | Sets the quietInstall flag to ON, which suppresses the display of wizard pages, user dialog boxes, and other user messages that DPInst and Windows generate | |
| /f | Sets the forceIfDriverIsNotBetter flag to ON, which configures DPInst to install a driver on a device even if the driver that is currently installed on the device is a better match than the new driver. | |
| /se | Sets the suppressEulaPage flag to ON, which configures DPInst to suppress the display of a EULA page. | |
| Shutdown | ||
| /r | Restarts the computer after shutdown. | |
| /t xx | Sets the time-out period or delay to XXX seconds before a restart or shutdown. This causes a warning to display on the local console. You can specify 0-600 seconds. If you don’t use /t, the time-out period is 30 seconds by default. | |
| /c “comments” | Enables you to comment in detail about the reason for the shutdown. You must first provide a reason by using the /d option. You must enclose comments in quotation marks. You can use a maximum of 511 characters. | |
| /f | Forces running applications to close without warning users. Caution: Using the /f option might result in loss of unsaved data. | |
| /d p:0:0 | Lists the reason for the system restart or shutdown. The value p indicates that the restart or shutdown is planned. |
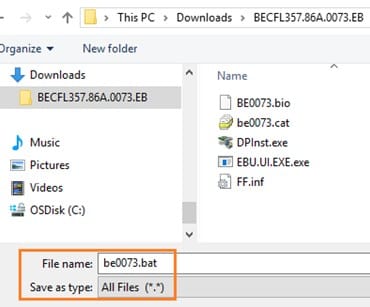
5. Save the batch file:
- Save it to the same folder as the extracted files.
- The file extension must be .bat.
- Save the file as type All Files (*.*).

- Copy the folder with all files to the target Intel NUC.
- Open a Command Prompt in Administrator mode (PowerShell isn’t supported):
- Click the Windows button and type Command Prompt.
- Right-click on Command Prompt and select Run as Administrator.
- In the Command window, navigate to the folder containing the BIOS update files and the .bat file.
- Type the complete .bat file name and press Enter to launch the update process.
- Windows restarts and the BIOS update process begins.
- After the update is complete, the system starts Windows.
| If you’re using BitLocker to enable encryption on a system drive: 1. You might run into issues when performing a BIOS update, such as having to enter a recovery key during startup. 2. You can modify the .BAT file (sample below) to temporarily suspend BitLocker (and then resume after one reboot).manage-bde -protectors -disable C: -RebootCount 1 DPInst.exe /q /f /se Shutdown /r /t 10 /c “Upgrading the BIOS. The computer will reboot in 10 seconds” /f /d p:0:0 3. For more information, see How to Suspend BitLocker Using Command Prompt. |
